
Bathroom Remodel Sequence: Why the Order of Work Matters More Than the Materials

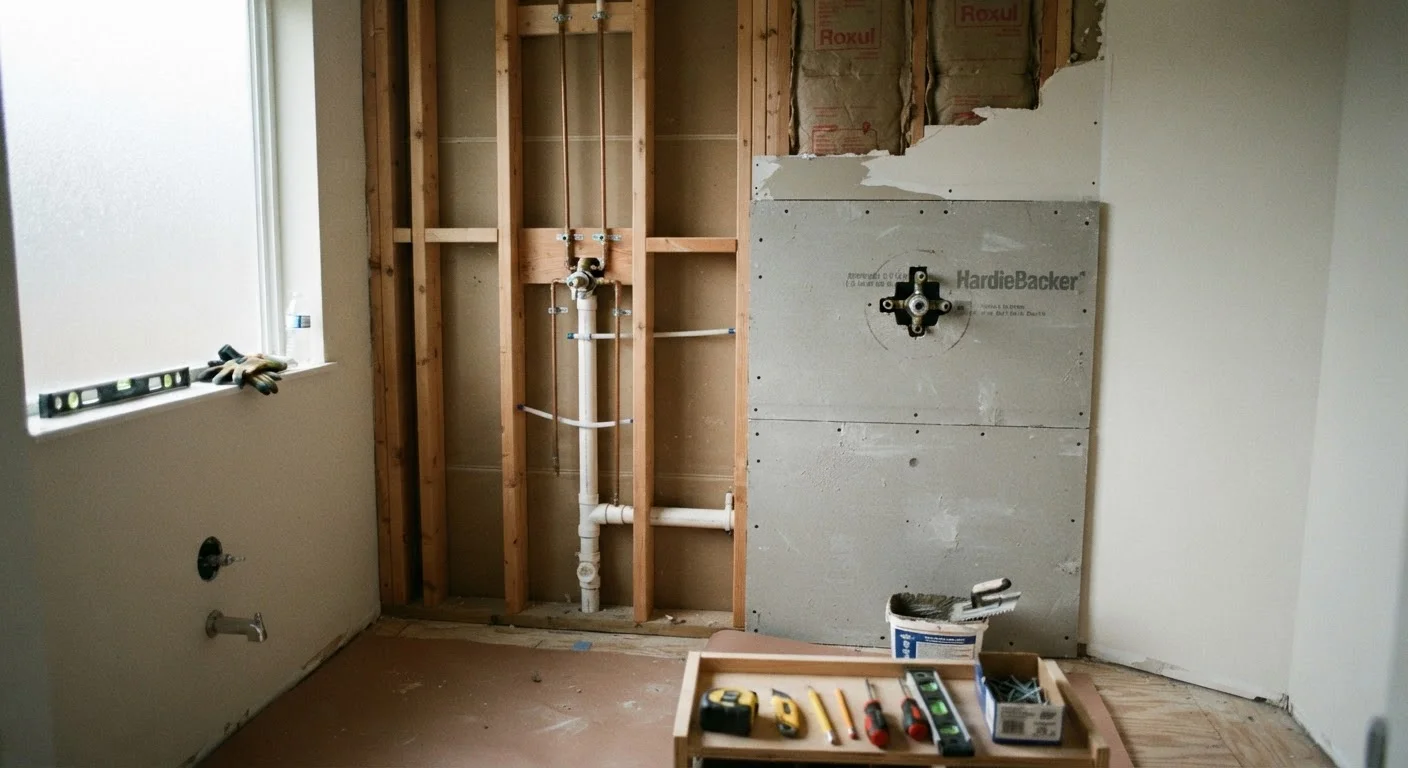
Photo: FaqsBay.com | Trending Blogs, Top Genres editorial
Key Takeaways
- Plumbing and electrical rough-in must be completed and inspected before any wall surfaces are closed up.
- Waterproofing the shower and floor substrate comes before tile — never after.
- Painting happens after tile grout cures but before fixtures and trim are installed.
- Skipping or reordering steps usually costs more to fix than doing it right the first time.
- Many bathroom renovations require permits — confirm local requirements before work begins.
Why Sequence Is the Real Skill in Bathroom Renovation
Most homeowners focus their planning energy on material choices — which tile, which vanity, which faucet finish. Those decisions matter, but they're secondary to one less glamorous question: in what order does the work actually happen? Get the sequence wrong and you'll find yourself cracking out freshly laid tile to access a leaking supply line, or repainting a ceiling you've already scuffed installing a light fixture.
A bathroom renovation follows a strict logic driven by two principles: work from the inside out (structural and hidden systems before surfaces), and work from the top down (ceiling before walls before floor). Deviating from either principle typically creates rework — which is the most expensive kind of work there is.
This guide lays out the correct sequence for a full bathroom remodel. If your project is partial — say, just retiling the shower or replacing a vanity — you can focus on the relevant phase, but understanding the full picture helps you avoid disturbing work you'll need to protect. For a broader look at how sequencing fits into renovation planning generally, see our comprehensive renovation owner's resource.
What you will need
Before a Single Tool Comes Out
Two things must happen before demolition: planning and permitting. Bathroom remodels that involve moving plumbing, adding electrical circuits, or altering the layout almost always require a permit in US jurisdictions. Pulling permits isn't bureaucratic busywork — inspections at rough-in stage catch problems before walls are closed, protecting you legally and financially. Read our plain-language guide to home renovation permits to understand what typically triggers a permit requirement and how the process works.
Also confirm all your material selections — tile, fixtures, vanity dimensions, shower valve placement — before demolition begins. Changes mid-project are far more disruptive in a bathroom than in almost any other room.
Permits Protect Your Investment
The Correct Step-by-Step Sequence
Follow these phases in order. Each one creates the conditions the next phase depends on.
Demolition
Remove existing fixtures, vanity, toilet, and any materials being replaced. Demo wall surfaces back to the studs if you're retiling or replacing drywall. Protect the subfloor — if it's structurally sound, you want to keep it. Bag debris and remove it promptly; a clean workspace prevents damage to framing and prevents tripping hazards.
Rough Plumbing
This is when supply lines and drain lines are repositioned or extended if your layout is changing. If you're keeping the same fixture locations, this phase may be minimal. Work must be done before walls are closed. Common tasks include setting the shower valve body, roughing in the tub drain, and repositioning the toilet flange if needed.
Rough Electrical
Add or reroute circuits as needed — GFCI-protected outlets, exhaust fan wiring, vanity light circuits. In the US, bathroom receptacles within a certain distance of water sources are required by code to be GFCI-protected. Like plumbing, rough electrical must be inspected before walls are covered.
Insulation and Backer Board
Once inspections are passed, insulate exterior walls as needed, then install appropriate wall substrate. Standard drywall is not suitable for wet areas — shower walls and areas within splash range require cement backer board or a comparable moisture-resistant panel. Use moisture-resistant drywall (often called greenboard) in non-wet areas like above vanities.
Waterproofing
Apply a waterproofing membrane to the shower walls and floor substrate before any tile is set. This step is non-negotiable and frequently skipped by inexperienced DIYers — it is the primary defense against water intrusion into the wall cavity. Follow the manufacturer's coverage and cure time requirements exactly.
Tile Installation
Set wall tile before floor tile so that floor cuts can be made to meet the wall tile cleanly. Start shower walls from a level reference line, not the floor (floors are rarely perfectly level). Use appropriate thinset mortar for the substrate type. Allow the mortar to cure fully before grouting — typically 24 hours, but confirm with the product data sheet.
Grouting and Caulking
Grout tile joints once mortar has fully cured. Use unsanded grout for joints under 1/8 inch, sanded for wider joints. After grout cures (typically 72 hours minimum), apply silicone caulk — not grout — at all inside corners and at the tile-to-tub or tile-to-floor transition. Grout cracks at corners because those joints flex; caulk accommodates movement.
Painting
Paint walls and ceiling after tile work is complete but before fixtures and trim are installed. This sequence lets you cut in cleanly against tile without worrying about scuffing installed hardware. Use a paint specifically formulated for high-humidity spaces. Prime bare drywall before painting — skipping primer leads to uneven sheen and poor adhesion.
Vanity, Toilet, and Fixture Installation
Set the vanity cabinet first, then connect plumbing once the countertop and sink are in place. Install the toilet using a new wax ring — never reuse the old one. Set the shower valve trim, showerhead, and any tub hardware. Connect supply lines and test every connection under pressure before moving on.
Electrical Trim-Out and Accessories
Install vanity light fixtures, outlet cover plates, the exhaust fan grille, and any other electrical trim. Then mount towel bars, toilet paper holders, mirrors, and shelving. Installing accessories last protects them from damage during tile and painting work and ensures accurate placement now that all surfaces are finished.
Finishing Touches and Final Walkthrough
Once fixtures, trim, and accessories are set, do a systematic walkthrough before calling the project complete. Run water through every fixture and check supply connections and drains for drips. Test the GFCI outlets by pressing the test and reset buttons. Verify the exhaust fan moves air adequately — a properly sized fan should cycle the air volume of the bathroom roughly eight times per hour. Check that all caulk joints are continuous with no gaps, particularly at the tub-to-tile and floor-to-fixture transitions.
If painting is the last significant surface task, give it proper attention — bathroom paint must be a mold- and moisture-resistant formulation, and prep work determines how long it holds up. For a thorough walkthrough of getting paint right, see our guide to painting a room the right way.
Document Everything Before Closing Walls
The content provided on our blog site traverses numerous categories, offering readers valuable and practical information. Readers can use the editorial team’s research and data to gain more insights into their topics of interest. However, they are requested not to treat the articles as conclusive. The website team cannot be held responsible for differences in data or inaccuracies found across other platforms. Please also note that the site might also miss out on various schemes and offers available that the readers may find more beneficial than the ones we cover.